How To Create A Standalone Compiz Session In Ubuntu

7:29 PM

Custom compiz session ubuntu

This guide has been written by WebUpd8 reader Neil Rodgers and it shows how to create your own standalone Compiz session in Ubuntu (the instructions below are for 11.10, but they may work in other Ubuntu versions). Using a custom Compiz session gives you flexibility to load only what you want, so you can get a lightweight session, while still using Compiz.

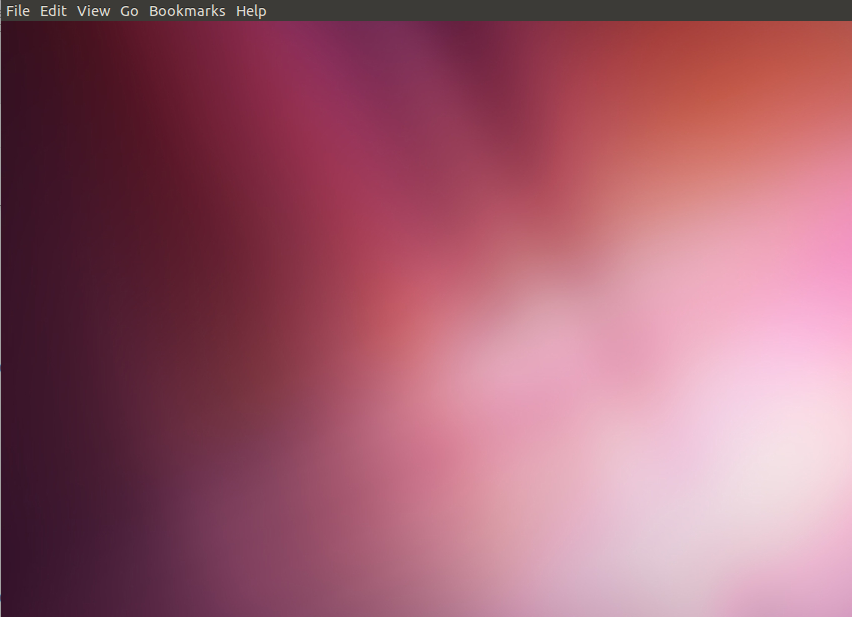
In the screenshot above you can see Unity 2D panel, Dockbarx (dockx), slingshot-launcher and Compiz drawing the wallpaper. But of course, there are many different combinations of docks, panels, etc. you can use to create your own environment. I chose to mimic Unity. Don't ask why. I love using Unity, like to tinker and was bored one night.

Things I've installed:

CCSM:
sudo apt-get install compizconfig-settings-manager compiz-plugins-extra

DockBarX:
sudo add-apt-repository ppa:nilarimogard/webupd8
sudo apt-get update
sudo apt-get install dockbarx dockbarx-themes-extra

Marlin (we'll use Compiz set to draw the background, but you can skip this if you want):
sudo add-apt-repository ppa:marlin-devs/marlin-daily
sudo apt-get update
sudo apt-get install marlin

If you want to use DockX, you'll also need a menu. You can use Cardapio, a menu Indicator or Slingshot launcher. To install Slingshot, use the commands below:
sudo apt-add-repository ppa:elementaryart/unstable-upstream
sudo apt-get update
sudo apt-get install slingshot-launcher


1) As explained here, the first step is to create the Compiz xsession. This will create a session called Compiz in your session list in LightDM.

In terminal:
gksu gedit /usr/share/xsessions/compiz-session.desktop

You now have an empty file. Copy and paste this code into it:
[Desktop Entry]
Name=Compiz
Comment=This session logs you into Compiz standalone
Exec=/usr/local/bin/compiz-session
Type=Application

You can call this session whatever you like by changing Name=Compiz to Name=(your custom name) in the code above. Save and close the file when you are done.

2) Now we will make the compiz-session launcher in /usr/local/bin. This launcher will start the compiz-session with dbus.

In terminal:
gksu gedit /usr/local/bin/compiz-session

Then copy and paste this code into the file:
#!/bin/bash
if test -z "$DBUS_SESSION_BUS_ADDRESS"; then
eval `dbus-launch --sh-syntax --exit-with-session`
fi
compiz --replace ccp & wmpid=$!
sleep 1
if [ -f ~/.compiz-session ]; then
source ~/.compiz-session &
else
xterm &
fi
# Wait for WM
wait $wmpid

Save and close this file then make it executable using the command below.

In terminal:
sudo chmod 755 /usr/local/bin/compiz-session


3) The above code mentions the file ~/.compiz-session. This file will be read at the start of your Compiz session and will load whatever commands you put in it. We need to create it and choose what we want to load in our session. This will be a hidden file in your home folder. This is where you can get creative and piece together different components to make something unique.

In terminal:
gedit ~/.compiz-session

Or right click on an empty spot in your home folder and choose create new file. This is what I have in mine.

#!/bin/bash
gnome-settings-daemon &
unity-2d-panel &
nm-applet &
bluetooth-applet &
dockx &

The first entry for gnome-settings-daemon will load all your system settings and themes etc. Then we have our panel, network manager, bluetooth and finally our dock. Put what you want in here (for instance, to use Nautilus for drawing the background, add "nautilus -n &"; instead of "dockx" you can use "avant-window-navigator" for instance, and so on) then save and close.


4) Now we can log out and try the new session but before you do make sure you keep reading so you know what to expect. Save this guide in your home folder so you can get back to it after logging in. When you first log in you'll notice your panel and dock will load with a black, sometimes glitchy looking screen as your wallpaper. We'll fix this but first lets take a few seconds to tweak DockBarX. Right click on an empty spot in the dock and choose "Properties". You can modify whatever other settings you like but these will give you the Unity launcher clone:
Dock:
- Type = panel
- Position = left
- Behavior = panel
- Size = 42
- Offset = 24
Appearance - Theme = unite_v
Window List: uncheck previews if it is checked as they don't seem to be working
Plugins: make sure Unity quicklists and badges are checked


5) Ok, now onto the glitchy black background. This is because Nautilus handles the desktop and wallpaper and we didn't load it in the session. You can add it to the .compiz-session file if you want or you can have Compiz draw the wallpaper (if you use desktop icons or have to have the right click menu on the desktop then stick to loading nautilus). To start CCSM open a terminal by pressing "Ctrl+Alt+t" and type "ccsm" to launch CompizConfig Settings Manager. Add it to your dock for now (right click the icon and select "pin to launcher".

Optional step: Create a custom profile for your session in CCSM. Compiz will load with the "default" profile which is used for other sessions such as Gnome fallback or even Unity2d if you run it in that environment. If you just use Unity3d then you don't need to do this because Unity3d automatically loads the "Unity" profile and your changes in CCSM will not affect that session.


Activate the jpeg, png, svg and text plugins in the "image loading" CCSM section. Now activate the "wallpaper" plugin under "utilities", choose "new" and select a background (don't select the default Ubuntu wallpaper, it's not an actual .png and it will fail to load; if it doesn't load right away it will on the next login,more on logging off in the next step).


Now setup slingshot-launcher by enabling "commands" and entering "slingshot" (no quotes) in an empty field. Choose your preferred keys or screen edge or both. I made mine open gnome-shell style by setting the edge binding to the top left corner so it launches with the mouse (I've also created a launcher with an Ubuntu icon that launches slingshot and added it to my dock). 


To get Slingshot not to overlap with the top panel or dock, open CCSM, make sure the "Place Windows" plugin is enabled, then on the "Fixed Window Placement" tab, under "Windows with fixed position", click new and under "Positioned windows" enter "class=Slingshot" (without the quotes), 50 for X Position and 25 for Y Position (you can change these if these values don't look ok for you).

Now maximize a window and you'll see that it's titlebar doesn't merge with the unity2d panel. Fix this by going to Effects > Window decoration > Decoration windows and changing "all" to "!state=maxvert". Now tweak whatever else you'd like and we'll move to the next part.

6) If you try to log off the normal way through the shutdown menu it doesn't work. Its made to log out of a gnome-session, not a compiz-session. So we can work around this a couple ways and I'm sure there are more, but the first is pretty straight forward. Kill the compiz-session process. You can do this via system monitor or by typing "pkill compiz-session" (again no quotes) in a terminal. There is a script I've found here,  in comment #8 that also works. You can even make a launcher that points to the script or runs the pkill command and add it to DockBarX if you want.


This is the first guide I have written about anything so please excuse me if there are mistakes or its hard to follow. I'm also not an expert with using Ubuntu and or Linux but love using it and love the choice it offers. Feel free to offer suggestions, corrections or any other feedback. Thanks! - Neil

0 comments

» read more....

Install Emerald In Ubuntu 11.10 Oneiric Ocelot Via PPA

5:58 AM

emerald


Emerald Window Decorator is not available in the Ubuntu 11.10 Oneiric Ocelot repositories so to make it easier to install, I've uploaded the latest stable Emerald version (0.9.5) to the main WebUpd8 PPA.

With Emerald, you can get some beautiful window decorators, like the one in the screenshot above, or these:

emerald window decorator

emerald ubuntu

And many others.


Install Emerald in Ubuntu 11.10 Oneiric Ocelot


Note: Emerald requires Compiz, so it doesn't work with GNOME Shell, etc.

To add the PPA and install Emerald 0.9.5 in Ubuntu 11.10 Oneiric Ocelot, use the commands below:
sudo add-apt-repository ppa:nilarimogard/webupd8
sudo apt-get update
sudo apt-get install emerald

For Ubuntu 11.04 Natty Narwhal, see: Get Emerald To Work In Ubuntu 11.04 Natty Narwhal

Once installed, get some Emerald themes via Gnome Look, load them in Emerald Theme Manager, and start Emerald by pressing ALT + F2 and entering:
emerald --replace

To continue using Emerald after a logout / restart, install CompizConfig Settings Manager:
sudo apt-get install compizconfig-settings-manager

Then open CCSM, click the "Window Decoration" plugin and under "Command", enter: "emerald".


If you want to go back to the default window decorator, open CompizConfig Settings Manager, click the "Window Decoration" plugin again and next to "Command", click the reset button on the right:


Then log out and log back in.

Post inspired by tahutek.net

0 comments

» read more....

Unity 3D (Launcher, Top Panel) Doesn't Load - Possible Fixes

7:18 PM


While testing various stuff, I've managed to break Unity 3D quite a few times (by "breaking", I mean: the launcher, Dash and the top panel don't load and you log in to an empty desktop), like a recent bug that was fixed in Ubuntu Tweak 0.6 pre-release that caused Unity to crash. So I though I'd write a post with a few basic solutions for this, in case it happens to some of you too. 

This usually occurs if somehow the Unity plugin has been unchecked in CompizConfig Settings Manager: manually, by enabling an unsupported Compiz plugin that disables it, by some third-party application and so on.


Before proceeding, you must check and see if the issue is with Unity 3D itself or if it stopped working because of a bad graphics driver upgrade. To check this, login to to Unity 2D or any other session (GNOME Fallback, GNOME Shell, etc.) and run the following command in a terminal:
/usr/lib/nux/unity_support_test -p

You should get "yes" everywhere. If not, and Unity 3D used to work, it means there's something wrong with the graphic drivers and you should try to reinstall them. If you did get "yes" when running the above command, it means Unity is broken, so let's try to get it working again.


Please note that I've only tested the instructions below on Ubuntu 11.10 Oneiric Ocelot.


Unity 3D is broken - how to fix it


A. Launch a terminal using CTRL + ALT + T to be able to run CCSM and enable the Unity plugin


Login in as usual to Unity 3D ("Ubuntu" session), launch a terminal window by pressing CTRL + ALT + T and install CompizConfig Settings Manager (if you've managed to break Unity, CCSM is most probably installed, but anyway):
sudo apt-get install compizconfig-settings-manager


Then open CompizConfig Settings Manager by typing the following command in the terminal:
ccsm

And enable the Ubuntu Unity Plugin. If CCSM asks to resolve some conflicts, click the "Resolve Conflicts" button, then select the button on the right for each conflict ("Disable...").

If Unity doesn't start immediately after this, press CTRL + ALT + F1. This will take you to tty1 where you must enter your username and password. Here, type the following commands:
export DISPLAY=:0.0
unity --replace

Now press CTRL + ALT + F7 - this should take you back to the Unity desktop.

If Unity still doesn't start, press CTRL + ALT + F1 again and type:

- Oneiric+:
sudo service lightdm restart
- Natty:
sudo service gdm restart

This should restart LightDM / GDM so the login screen should show up - log in and Unity 3D (the launcher, dash, top panel) should now load.


B. Launch CCSM from tty1 to enable the Unity plugin

In some cases, you can't launch a terminal after trying to log in to Unity. In that case, here's what you can do.

Log in to the "Ubuntu" (Unity 3D) session anyway, it doesn't matter that Unity doesn't load, and press CTRL + ALT + F1. This will take you to tty1 where you must enter your username and password. Here, type the following commands:
export DISPLAY=:0.0
ccsm

Now press CTRL + ALT + F7. This should take you back to your Unity desktop and CompizConfig Settings Manager should start. Enable the Ubuntu Unity Plugin now. If CCSM asks to resolve some conflicts, click the "Resolve Conflicts" button, then select the button on the right for each conflict ("Disable...").

If Unity doesn't start immediately after doing this, close CCSM, press CTRL + ALT + F1 again and type:
unity --replace

Then press CTRL + ALT + F7.


If Unity still doesn't start, press CTRL + ALT + F1 again and type:

- Oneiric+:
sudo service lightdm restart
- Natty:
sudo service gdm restart

This should restart LightDM / GDM so the login screen should show up. Now log in to the "Ubuntu" (Unity 3D) session.


A bit off topic: this also works if GNOME Shell crashes and you want to restart it - press CTRL + ALT + F1, type "export DISPLAY=:0.0", then "gnome-shell --replace" and then press CTRL + ALT + F7.


C. Reset Unity and Compiz

It was also reported that you should be able to enable the Unity plugin by running CompizConfig Settings Manager in some other session (like Unity 2D or the classic/fallback GNOME session) and then log in to the Unity 3D session. However, this didn't work in my test under Ubuntu 11.10 Oneiric Ocelot (on my computer and 2 VMs). But you can try this too before trying to reset Unity.


If no solution above works, you can reset Compiz and Unity. I've left this as the last possible solution because you will lose any Compiz customizations you've set.

Log in to a different session (such as Unity 2D) or press CTRL + ALT + F1 and type:
gconftool-2 --recursive-unset /apps/compiz-1
gconftool-2 --recursive-unset /apps/compizconfig-1
unity --reset

Now log out and log in to Unity 3D ("Ubuntu" session) - the launcher and top panel should now load.

0 comments

» read more....

How To Find Out If Your Computer Can Run Unity 3D (w/ Compiz)

11:02 PM

If Unity 3D isn't working on your computer and you want to find out if this is because of a bug, because you're using the wrong drivers or because of your computer's hardware, you can use a command which lets you know if your computer can run Unity 3D:

/usr/lib/nux/unity_support_test -p

Unity supported computer

If you get "yes" for "Unity 3D support", your computer should be able to run Unity based on Compiz (Unity 3D) and according to an AskUbuntu answer, if you get "yes" this most probably means you can run GNOME Shell too because Unity and GNOME Shell have similar hardware requirements.


This command only works on Ubuntu 11.04 or 11.10. If you don't use Ubuntu 11.04 or 11.10, you can check out the Ubuntu-certified hardware list to see if your computer can run Unity 3D (with Compiz).


via lffl and AskUbuntu

0 comments

» read more....

DockBarX Live Window Previews Finally Work With Compiz 0.9.x

3:32 AM

DockBarX live window previews

DockBarX is a lightweight taskbar / panel replacement for Linux. It works as a GNOME panel applet (for GNOME 2.x), as an Avant Window Navigator applet or as a stand alone dock (called DockX) that you can use in any desktop environment: KDE, XFCE, GNOME 3 (with GNOME Shell), etc.

DockBarX has been updated today with a work-around for the bug that caused live windows previews not to work with Compiz 0.9.x in GNOME (well, for most of us anyway because it seems it worked for some of you).

However, the live window previews still don't work in GNOME Shell (because this feature requires Compiz).


Here is a video I've recorded with DockBarX running in AWN (and live window previews activated of course):


Install DockBarX in Ubuntu


As usual, the latest DockBarX is available in the main WebUpd8 PPA for Ubuntu 11.10, 11.04, 10.10 and 10.04 - add the PPA and install it using the following commands:
sudo add-apt-repository ppa:nilarimogard/webupd8
sudo apt-get update
sudo apt-get install dockbarx dockbarx-themes-extra

To install the AWN applet, use the following command:

sudo apt-get install awn-applet-dockbarx

Once installed, look for "DockBarX Preference" in the menu / dash to configure how DockBarX or DockX looks and behaves.

To launch DockBarX in the stand-alone mode, press ALT + F2 and type: "dockx". If you use Gnome2 panel or Avant Window Navigator, DockBarX should show up in the applet list so add it like with any other applet.


If you're not using Ubuntu, download DockBarX via Gnome-Look.

0 comments

» read more....

Ambiance To Get A Dark Toolbar, Compiz Modal Dialogs Update [Oneiric]

10:10 PM

Ambiance, the default Ubuntu theme, will get a dark toolbar very soon. The news comes from Andrea Cimitan who has posted a screenshot on Google+:

Ambiance Dark toolbar
(The theme is not yet available in Oneiric)


If you want to use Ambiance with a dark toolbar already, you can use Ambiance Evolution, an unofficial version that already has a dark toolbar - see THIS page for more info.


In other Oneiric news, Compiz was updated today and the modal dialogs finally look like they are supposed to for Unity 3D:

Unity 3D

Previously, the modal dialogs had a regular window titlebar in Unity 3D.


First screenhot thanks Andrea Cimitan @ Google+, via chimerarevo.com

0 comments

» read more....

Modal Dialogs Compiz Plugin Lands in Ubuntu 11.10 [Oneiric Updates]

2:20 AM

Modal dialogs Unity Compiz

The Compiz modal dialogs finally landed in Ubuntu 11.10 Oneiric Ocelot today. There was some initial work for this, but the actual modal dialogs Compiz plugin has just been uploaded to Oneiric.

Here's a video demoing the new Compiz modal dialogs (Unity 3D):


"Modal dialogs" can be turned off since it's a Compiz plugin. You can also tweak the alpha transparency and fade time:

Compiz modal dialogs plugin


An initial modal dialogs implementation was also started for Unity 2D and is available for a few days now, but they don't work like actual modal dialogs yet (they are not attached to the parent window and also, the parent window isn't dimmed):

Modal dialogs Unity 2D


The update should be available for Oneiric users in a few hours, but according to the Compiz changelog, you'll have to reset the profile to get modal dialogs because this doesn't support upgrading.


Note: The modal dialogs are work in progress so a lot may change until the final Ubuntu 11.10 release!

0 comments

» read more....

DockBarX 0.44 Can Run As Stand-Alone Dock, Gets Unity Quicklists, More

9:07 PM

DockBarX
(DockBarX running as an Avant Window Navigator applet)


After four months of development, a new DockBarX version has finally been released: 0.44. Previously, DockBarX could run as a Avant Window Navigator / GNOME Panel applet but starting with this version, DockBarx works as a stand-alone dock too (run "dockx" to launch it), great for those running GNOME Shell or the classic GNOME session.


This new feature also comes with some options:
  • you can position the dock on the left / bottom / right / top
  • there are 3 modes: centered, panel or corner
  • you can change the dock size
  • multi-monitor support: you can specify the number of monitors via command line ("dockx --monitor 1").


DockX
(DockBarX running as a stand-alone dock)


There is still a lot of work to do for this new feature though: it doesn't have autohide, etc.


But that's not the only new feature in DockBarX 0.44. The new version also comes with:
  • Unity quicklists support
  • Another Unity-like feature - number shortcuts: for instance you can press SUPER+1 to select the first group, etc. But unlike Unity, the numbers are not displayed when holding the SUPER key.
  • Improved keyboard shortcut handling
  • Locked lists: "one click switch solution as long as you are prepared to sacrifice some screen real-estate. By selecting "Use locked list" from the group menu of a group with more than one window, you'll get a window list that stays open indefinitely".


Unfortunately there's a bug in Compiz 0.9.x which makes the DockBarX window previews very dark so if you use Ubuntu 11.04, the window preview feature will not work proprely (unless you use the downgraded Compiz). Also, the window previews feature won't work under GNOME Shell because DockBarX requires Compiz for this feature.


DockBarX screenshots


DockX
(DockX - Unity quicklists)


DockBarX
(Media Player controls available in DockBarX)


DockBarX
(DockBarX running as a GNOME Panel applet)


DockX
(DockX - recent documents)


Install DockBarx in Ubuntu


As usual, DockBarX is available in the main WebUpd8 PPA for Ubuntu 10.04, 10.10 and 11.04. It also works under Ubuntu 11.10 but not as a GNOME3 panel applet.

Add the PPA and install DockBarX 0.44 using the commands below:
sudo add-apt-repository ppa:nilarimogard/webupd8
sudo apt-get update
sudo apt-get install dockbarx dockbarx-themes-extra

To also install the Avant Window Navigator DockBarX applet, use the following command:
sudo apt-get install awn-applet-dockbarx


Then, to use DockBarX:
  • with GNOME 2.x Panel: right click the panel, select "Add to panel" and add "DockBarX".
  • with Avant Window Navigator: in the AWN preferences, add DockBarX to your dock
  • as a stand-alone dock: press ALT + F2 and enter: "dockx".

For configuring DockBarx, a new "DockBarX Preference" entry should be available in your menu.


Arch Linux users can get DockBarX from AUR. Thanks to madek for the heads up!

If you don't use Ubuntu or Arch, download DockBarX via its GNOME-Look page.


Report any bugs you may find @ Launchpad.

0 comments

» read more....